How Do You Toast Nuts Without Burning Them?

Toasting nuts transforms them. The dry heat drives off surface moisture, triggers the Maillard reaction in the proteins, and coaxes volatile aromatic compounds out of the oils — producing a deeper color, a satisfying crunch, and a nuttier, more complex flavor than raw nuts deliver. The gap between perfectly toasted and burnt can be as little as sixty seconds, which is why so many batches end up in the bin.
The fix is not a single trick. It comes down to understanding heat, timing, and the specific behavior of whichever nut you are working with.
Why Nuts Burn So Easily
Nuts are dense in fat, and fat conducts heat efficiently. Once a nut’s surface temperature climbs past the point where browning tips into scorching, the internal heat keeps rising even after you remove the pan from the flame. That carry-over effect catches most people off guard: a batch that looks borderline acceptable in the pan will look (and taste) bitter two minutes later on the cooling rack.
A second factor is oil content. Nuts like macadamias and pine nuts carry a high proportion of unsaturated fats, which oxidize and burn at lower temperatures than, say, chestnuts. Size and shape matter too: sliced or slivered nuts have a much greater surface area than whole ones, so they brown faster and require closer attention.
Finally, uneven size in a single batch is a reliable route to failure. If you pour a mix of whole almonds and almond slivers into the same pan, the slivers will be black before the whole nuts are done.
Stovetop Toasting: Control Over Everything
A dry skillet on the stovetop gives you the most direct feedback and the fastest correction time. Use a heavy-bottomed pan — cast iron or stainless steel — and keep the heat at medium or just below. Non-stick coatings can discolor at the temperatures needed, and thin pans create hot spots that scorch isolated patches.
Add the nuts in a single layer with no oil. Shake or stir every thirty to forty-five seconds. You are listening as much as watching: a faint crackling sound signals that moisture is escaping and browning is beginning. The moment you catch the first waft of toasted aroma, start tasting every thirty seconds.
When to pull them: Remove the pan from the heat when the nuts are about one shade lighter than your target color. Residual heat will carry them the rest of the way. Immediately tip them onto a cool plate or sheet of parchment — leaving them in the hot pan is the same as leaving them on the burner.
Stovetop times by nut type
These are starting points on medium heat; your pan, burner, and nut size will all shift the range.
- Pine nuts and sesame seeds: 2 to 4 minutes. They go from pale to dark in seconds; never walk away.
- Sliced or slivered almonds, flaked coconut: 3 to 5 minutes.
- Whole cashews, pecans, hazelnuts: 5 to 8 minutes.
- Whole almonds, walnuts, Brazil nuts: 7 to 10 minutes.
- Macadamia nuts: 5 to 7 minutes; watch carefully, their high fat content speeds browning.
Sizes within a type vary, so treat any timer as a cue to start paying attention, not a finish line.
Oven Toasting: Hands-Off, Bigger Batches
The oven suits larger quantities and situations where you want consistent, even color without constant stirring. Spread the nuts in a single layer on a rimmed baking sheet — a rim matters because nuts roll, and a flat tray sends them onto the oven floor the moment you pull it out.
Preheat to around 160–180 °C (325–350 °F). Lower temperatures take longer but give you more reaction time before the threshold between done and burnt. For whole, larger nuts, 170 °C (340 °F) is a reliable middle ground. For small or thin pieces like pine nuts or sliced almonds, stay at 160 °C (325 °F) or lower.
Shake or stir the pan every five minutes and check the color each time. The oven environment is less forgiving than the stovetop in one specific way: you cannot hear or smell the nuts as immediately. Set a timer, check earlier than you think you need to, and apply the same rule — pull them one shade before target.
Oven times by nut type
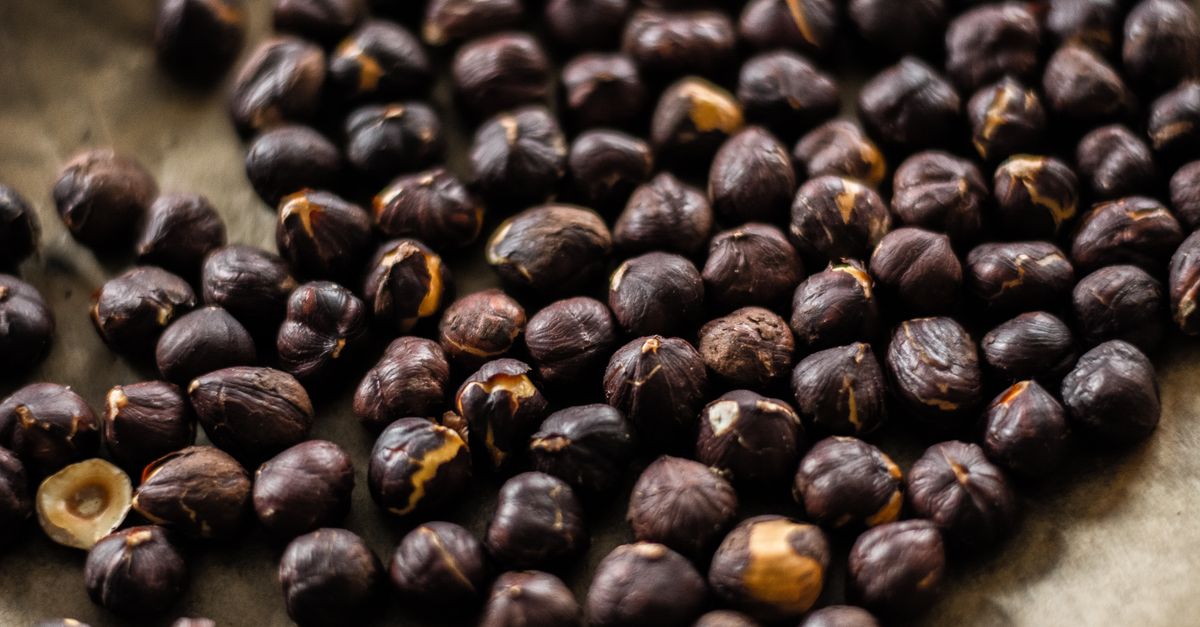
- Pine nuts, sesame seeds: 5 to 8 minutes at 160 °C (325 °F).
- Sliced almonds, flaked coconut: 7 to 10 minutes at 160 °C (325 °F).
- Pecans, walnut halves: 8 to 12 minutes at 170 °C (340 °F).
- Whole almonds, hazelnuts, cashews: 12 to 15 minutes at 170 °C (340 °F).
- Peanuts (raw, shelled): 15 to 20 minutes at 175 °C (350 °F), stirring halfway.
Again, these are starting checkpoints. A convection fan circulates air and speeds browning noticeably; if your oven is fan-assisted, reduce the temperature by about 10–15 °C or check a few minutes earlier.
Does the Type of Nut Change the Approach?
Yes, meaningfully. A few nut-specific notes worth knowing:
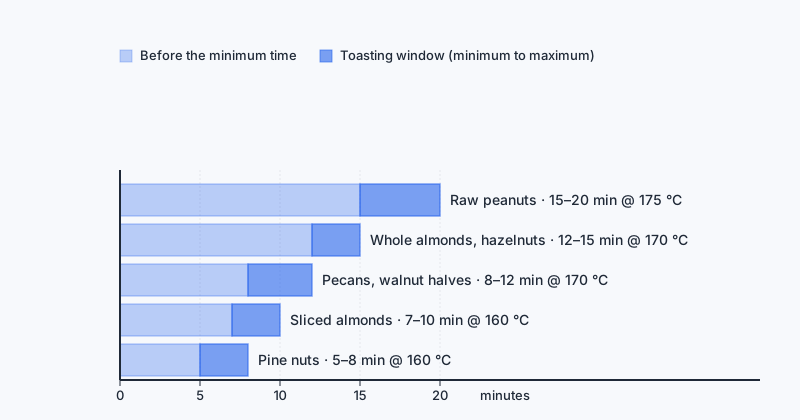
Hazelnuts need an extra step after toasting. Their papery skins are bitter and detach best when the nuts are hot. Tip them into a clean kitchen towel, fold it over, and rub vigorously for thirty seconds. Most of the skin comes off; some always stays, which is fine.
Walnuts have a relatively thin, wrinkled surface that catches heat unevenly. Medium-low heat and frequent stirring matter more here than with smoother nuts. They also turn bitter faster once they cross into over-toasted territory, so pull them early and taste immediately.
Peanuts sold as roasted are already heat-processed; you are only warming and crisping them. Raw, green peanuts need the full roasting treatment at a slightly higher temperature and longer time. Check the label before you start.
Coconut flakes contain sugars that caramelize quickly. They go from white to golden to scorched in a narrow window — treat them like pine nuts and never leave the pan.
Seeds (pumpkin, sunflower, sesame) follow the same logic as small nuts: high surface area relative to mass means fast browning. Sesame seeds in particular pop and jump when they are close to done, which is a useful auditory cue.
Salting, Sweetening, and Flavoring
Plain toasted nuts are versatile, but a little seasoning added at the right moment sticks better and tastes cleaner.
- Salt: Toss with a small amount of neutral oil and fine salt before toasting, or add flaky salt the moment the nuts come off the heat while the surface is still slightly tacky. Salt added mid-toast can draw moisture and slow browning.
- Spices (paprika, cumin, chili): Mix with oil before toasting so they bloom in the heat rather than sitting raw on the surface. Use small amounts; spices can burn before the nuts finish.
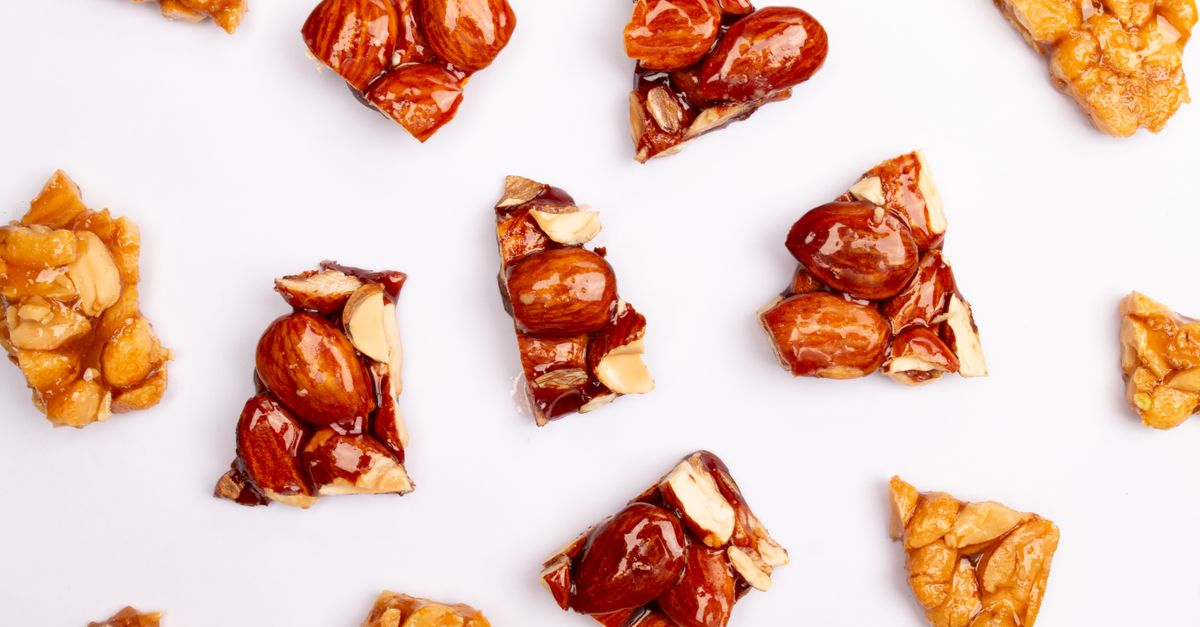
- Sugar glazes (honey, maple syrup): Add these in the last two minutes on the stovetop, or at the final few minutes in the oven, to caramelize without burning. A sugar coating applied at the start will blacken long before the nuts are done. Spread glazed nuts on parchment to cool; they will stick to anything else.
If you enjoy experimenting with seasoning blends for your toasted nuts, Simple Spice Blends: How to Make and Use Them at Home offers a handy primer for building your own mixes at home.
Storing Toasted Nuts Without Losing That Crunch
Toasted nuts are more perishable than raw ones. The heat accelerates oil oxidation, so the clock on rancidity starts running the moment they cool. A few practical points:
Allow the nuts to cool completely before sealing them in any container. Sealing warm nuts traps steam, softening the texture you just worked for. An airtight jar or zip-seal bag at room temperature keeps them in good condition for roughly a week, depending on the fat content of the nut and ambient humidity. In the refrigerator they stay fresher longer; in the freezer, toasted nuts hold their flavor well for a couple of months. In all cases, taste before using: rancid fat has a distinctive, waxy bitterness that ruins whatever you add the nuts to.
The same principles of avoiding trapped moisture apply to produce too, as explained in How to Store Cut Vegetables and Keep Them Fresh.
Frequently Asked Questions
Can you toast nuts in a microwave?
You can, with caveats. Spread the nuts on a microwave-safe plate and heat in thirty-second bursts on full power, stirring between each burst. Because microwave energy heats from within, the browning signal you rely on (color, smell, sound) comes late — the nut can be burnt inside while looking pale outside. The result is also less even than stovetop or oven toasting. It works for small quantities in a hurry, but it requires more attention, not less.
Should you add oil when toasting nuts on the stovetop?
For dry toasting, no. The nuts’ own oils are sufficient, and added fat creates an uneven surface that steams rather than browns cleanly. The exception is when you are coating with spices or a sugar glaze — a thin film of oil helps seasoning adhere and distributes heat more evenly across the nut’s surface.
Why do my toasted nuts taste bitter even when they look fine?
Bitter toasted nuts usually point to one of three things: they are slightly over-toasted (the tannins in walnut and pecan skins intensify quickly with heat), the batch included nuts that were already slightly rancid before toasting, or the thin skins were not removed where they should be (hazelnuts especially). Taste a raw nut from the same bag before you start; if it is already off, toasting will not fix it.
Do toasted nuts lose nutritional value?
Some heat-sensitive compounds do change during toasting. Fat-soluble vitamins are relatively stable, but some B vitamins and antioxidants do degrade at higher temperatures. The practical effect at typical toasting temperatures is modest, and the difference between lightly and heavily toasted is generally larger than the difference between raw and lightly toasted. If nutritional retention matters to you, lower temperature and shorter time is the direction to go.
How do you know when nuts are done if you cannot trust the color alone?
Smell and sound are the most reliable cues at the stovetop. A clear, warm, nutty aroma is the strongest indicator that Maillard browning is in full swing — remove the pan and start tasting immediately. The crackle of escaping moisture earlier in the process tells you browning is about to accelerate. In the oven, open the door and lean in; the smell reaches you before the color does, and it is more forgiving to act on smell than to wait for visual confirmation.