Camping Gear Checklist: Organize It Like a Pro
Why Most Camping Checklists Fail Before You Leave the Driveway
A camping checklist sounds simple — write down the stuff you need, tick it off, go camping. But most people either write a list so vague it misses the critical items (“tent” with no mention of stakes or a footprint) or download a generic template that includes inflatable kayaks when they’re hiking a ridge trail. The fix isn’t a longer list. It’s a smarter structure.
This guide walks through exactly how to build, organize, and use a camping gear checklist that actually reflects the trip you’re taking — not some theoretical outing.
The Core Framework: Organize by System, Not by Category
Most generic checklists group gear by type — clothing, cooking, safety. That feels logical but fails in practice, because when you’re packing a 35-liter backpack you don’t grab items by type; you pack by system and weight zone.
A better organizing principle is systems thinking: group gear by the function it serves during the trip.
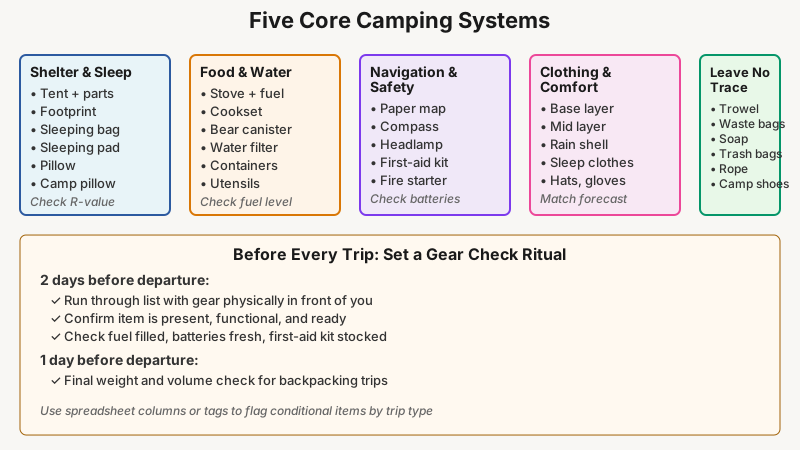
The Five Core Systems
1. Shelter & Sleep System This covers everything between you and the ground and sky. For most campers:
- Tent (body, poles, rainfly, stakes — list them separately)
- Ground cloth or footprint
- Sleeping bag rated to the expected low temperature
- Sleeping pad (R-value matched to the season)
- Camp pillow or stuff-sack stand-in
Note what changes by trip type: car camping allows a foam pad and a full pillow; backpacking demands you check pad R-value and bag weight.
2. Food & Water System Split this into cooking and purification — they’re easy to conflate and then forget one.
- Stove + fuel canister (check how full the canister is, not just whether you own one)
- Cookset and utensils
- Bear canister or hang kit (required in many wilderness areas)
- Water filter, purification tablets, or UV pen
- Water capacity: bottles, reservoirs, or collapsible containers
3. Navigation & Safety System
- Map of the area (paper — never rely solely on a phone)
- Compass and the ability to use it together
- Headlamp with fresh or spare batteries
- First-aid kit (check expiration dates on medications inside it)
- Emergency whistle, fire starter, emergency blanket
- Communication device: satellite messenger for remote trips where cell coverage is absent
4. Clothing & Comfort System This is where over-packers suffer and under-packers freeze. A layering framework cuts the guesswork:
- Base layer (moisture-wicking)
- Mid layer (fleece or light insulation)
- Outer layer (rain shell, windproof)
- Sleep-specific clothing (kept dry, worn only in the bag)
- Socks — two pairs minimum, one dedicated to sleep
- Sun hat, warm hat, gloves matched to forecast
5. Leave No Trace & Camp Management
- Trowel and waste bags (cathole depth: 15–20 cm, at least 60 meters from water or trails)
- Biodegradable soap
- Trash bags
- Rope or cord (for bear hang, clothesline, tarp rigging)
- Camp shoes or sandals
How to Build Your Personal Master Checklist
A master checklist is not the list you bring on every trip. It’s the single document you prune from. Here’s how to create one that actually works.
Step 1 — Do a Full Gear Dump
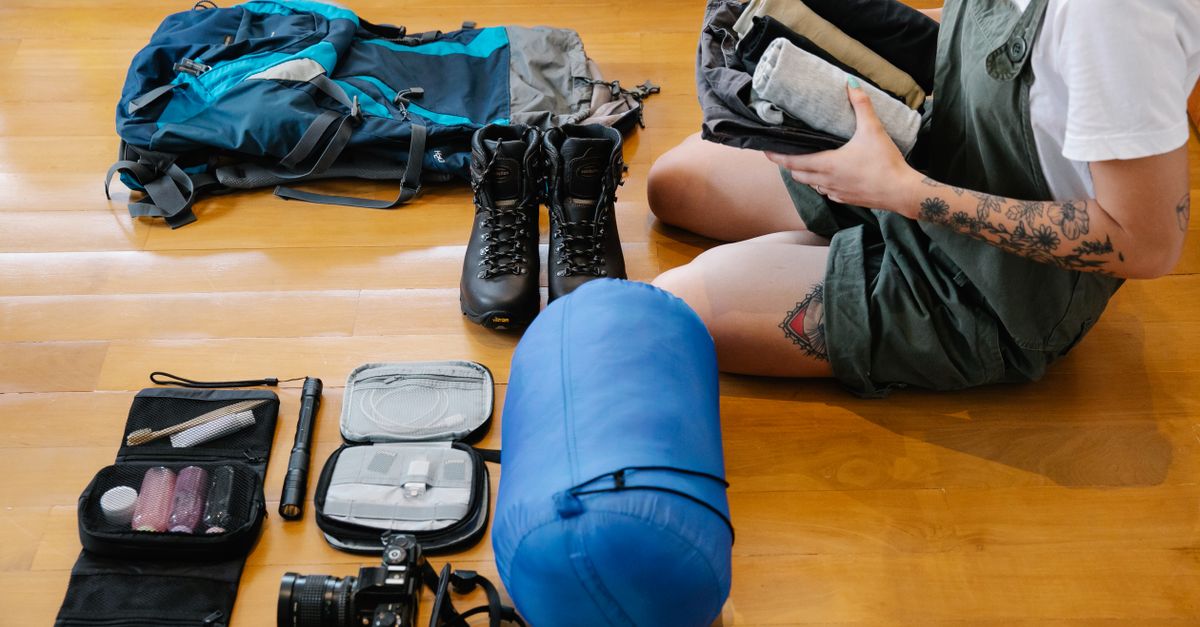
Before writing a single line, pull every item you own that could go camping out of storage and pile it in one place. This sounds excessive; it eliminates the classic failure mode of listing an item you no longer own or haven’t replaced since it broke.
Step 2 — Record What You Have, Then Add What You Need
List every item from your gear dump into the five systems above. Then review each system and ask: what would make this system fail? That question surfaces the forgotten items — the tent repair tape you keep meaning to replace, the empty lighter you’ve never refilled.
Step 3 — Add Trip Variables as Tags or Columns
A single master list works across trip types only if it flags what’s conditional. A simple way to do this: add a column (in a spreadsheet) or a tag (in a notes app) for trip context.
| Item | Car Camp | Backpack | Winter |
|---|---|---|---|
| Sleeping pad | Foam or inflatable | Inflatable, R ≥ 3.5 | Inflatable, R ≥ 5 |
| Water filter | Any | Lightweight filter | Filter rated for cold temps |
| Stove | Any | Canister or alcohol | Canister (cold-resistant fuel) |
This approach means your master list doesn’t multiply into three separate documents.
Step 4 — Set a Gear Check Ritual Before Every Trip
The list is inert if you only skim it while loading the car. A more reliable practice: two days before departure, run through the list with the gear physically in front of you. Confirm the item is present, functional, and ready (fuel filled, batteries fresh, first-aid kit stocked). One day before, do a final weight and volume check for backpacking trips.
Common Gaps That Even Experienced Campers Miss
These are the items that appear on almost no generic checklist but routinely cause real problems:
- Tent stake count: Most tents ship with fewer stakes than optimal. Count what you have; rocky or sandy terrain may require special stake types.
- Fuel canister quantity: A 100-gram canister lasts roughly 2–3 days of typical cooking — but “typical” varies widely depending on altitude, temperature, and how long you boil water. Check canister weight before packing, not just the presence of a canister.
- Permit and reservation documents: Many high-traffic wilderness areas now require timed-entry permits. A printed or cached offline copy of your permit is often required at the trailhead.
- Charging cables for devices you’re relying on: If your satellite communicator, GPS, or headlamp is USB-rechargeable, the cable is mission-critical.
- Prescription medications: Easy to pull from a daily routine and leave at home. Add them explicitly to the checklist.
- Bear canister regulations: Requirements vary significantly by location. The map or ranger station notes for your specific area should confirm the local rule — not a generic list.
Maintaining and Iterating the List Over Time
A checklist improves over trips, not before them. Build in a debrief habit: within 48 hours of returning home, note what you didn’t use (candidates for removal on future trips) and what you wished you had (candidates for addition). A short note in the list itself — “used every night” or “dead weight, left in car” — captures that context before you forget it.
Also check your gear during the offseason. Sleeping bag lofts compress permanently with poor storage; tent seams lose their waterproof coating; fuel canisters can slowly lose pressure. A once-a-year gear audit means your checklist stays accurate, not just optimistic.
Once your checklist is solid, the next step is making sure the gear itself survives storage, so check out How to Clean and Store Camping Gear: Stop Mildew Before It Starts for tips on preventing mildew and damage between trips.
Tools for Managing Your Checklist
You don’t need any specific app, but a few formats serve different campers better:
- Spreadsheet (Google Sheets or similar): Best for the master list with trip-variable columns. Easy to share with trip partners.
- Notes app (Apple Notes, Notion, or plain text): Works well for trip-specific pruned versions you can check off on your phone without cell service.
- Printed paper copy: Underrated — no battery needed, works in rain with a pencil.
- Gear management apps (such as Lighterpack, popular with backpackers): Let you log weights alongside items and calculate pack totals, which matters for any multi-day haul.
Whatever format you choose, the version you bring on the trip should be a pruned, trip-specific copy — not the 80-item master list. Scanning a 15-item trip-specific list in the field is far more reliable.
If you like the idea of tagging and tracking items in a structured system, Envelope Budgeting: Organize Your Finances Step by Step shows how the same category-based approach works for managing money.
Frequently Asked Questions
How detailed should a camping checklist be?
Detailed enough that each item is unambiguous — “tent stakes × 8” rather than “tent.” You should be able to hand your list to someone unfamiliar with your gear and have them pack correctly. More detail also surfaces what’s missing or broken before you arrive at the trailhead.
Should I use a different checklist for car camping vs. backpacking?
Use one master list with trip-type tags or columns, then generate a pruned trip-specific version from it. Maintaining separate lists creates drift — items you update on one but forget to update on the other.
How do I stop the checklist from getting too long?
After each trip, mark items as “unused.” After two or three trips where an item sits untouched, question whether it belongs on your personal list. A checklist bloated with theoretical gear you never deploy is less useful than a tight list of things you actually rely on.
What’s the right order to pack gear once it’s all checked off?
For backpacking: heavy, dense items (sleeping bag, food, water) go mid-pack close to your back; lighter items at the bottom and top. For car camping: the order of arrival at camp determines pack order — the last thing you’ll need goes in first.
Are digital checklists better than paper?
Neither is categorically better. Digital is easier to update and copy; paper works without power and in wet conditions. Many experienced campers use digital for planning and print a copy for the trip itself — both formats cover for the other’s weakness.