Hanging Shelves on Any Wall Type: What Actually Works
Shelf installation looks straightforward until you hit a wall that behaves differently from what you expected — the drill skates across the surface, the anchor pulls out overnight, or you hear a hollow knock where you hoped for solid backing. The wall type underneath your paint or plaster determines almost everything: which drill bit, which fastener, and how much weight you can safely hang. Here’s how to read each wall correctly and act on it.
How to Identify Your Wall Type Before You Drill
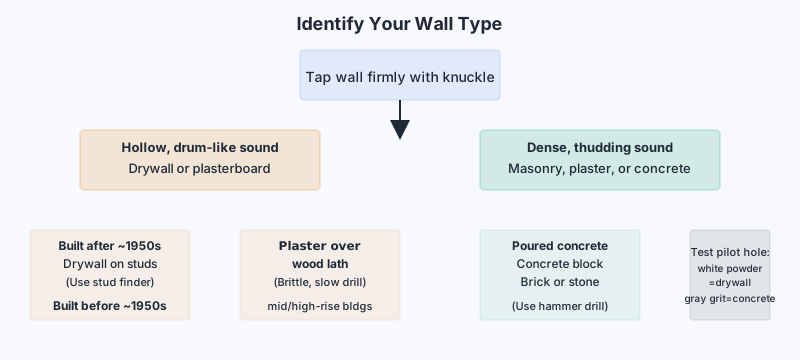
Tap the wall firmly with your knuckle across a wide area. A hollow, drum-like sound almost always means drywall or plasterboard; a dense, thudding sound suggests solid masonry, plaster over lath, or concrete. If you live in a house built before roughly the 1950s, expect plaster over wood lath — a sandwich of thin wooden strips beneath a thick lime or gypsum coat. Homes built after that era shifted heavily toward drywall (gypsum board screwed to studs). Apartments in mid- to high-rise buildings often have poured concrete or concrete block walls, sometimes covered with a skim coat of plaster.
A stud finder confirms stud locations in drywall and wood-lath walls. A rare-earth magnet dragged slowly across the wall can pick up drywall screws beneath the paint, marking the stud’s center even more precisely. For masonry, a small pilot hole drilled at slow speed quickly tells you what you’re in: drywall powders white; plaster produces fine white dust and may grate on lath; concrete and brick produce gray or reddish grit.
If this project is part of a bigger push to simplify your space, Minimalism for Beginners: Start Small, Change Everything can help you decide what’s actually worth displaying on those new shelves.
Shelves on Drywall
Drywall alone holds very little — a standard half-inch sheet has almost no pull-out strength once you exceed perhaps 10–15 lb on a single fastener. The strategy splits into two cases: hitting a stud or using a hollow-wall anchor.
Finding and using studs is almost always the stronger option. Standard drywall studs are spaced 16 inches on center in most North American construction, occasionally 24 inches. Once you find one stud with a finder, measure out in both directions in 16-inch increments to locate the next. Drive a 2½-inch coarse-thread wood screw directly through the drywall and into the stud — this connection can hold well over 60 lb per screw when the shelf bracket sits flush. Locate both ends of a long shelf bracket into studs whenever possible.
When studs don’t line up with your shelf position, hollow-wall anchors are the next best option. The options vary a lot by design:
| Anchor Type | How It Works | Typical Rated Load per Anchor | Best For |
|---|---|---|---|
| Plastic expansion anchor | Expands as screw drives in | 20–30 lb | Light items, small shelves |
| Toggle bolt (wing-style) | Wings open behind drywall | 50–100 lb | Heavier shelves, rails |
| Snap toggle (strap-style) | Metal channel stays in place | 70–150 lb | Shelves with real weight |
| Self-drilling drywall anchor | Threads into gypsum, no pre-drill | 20–50 lb | Quick tasks, moderate loads |
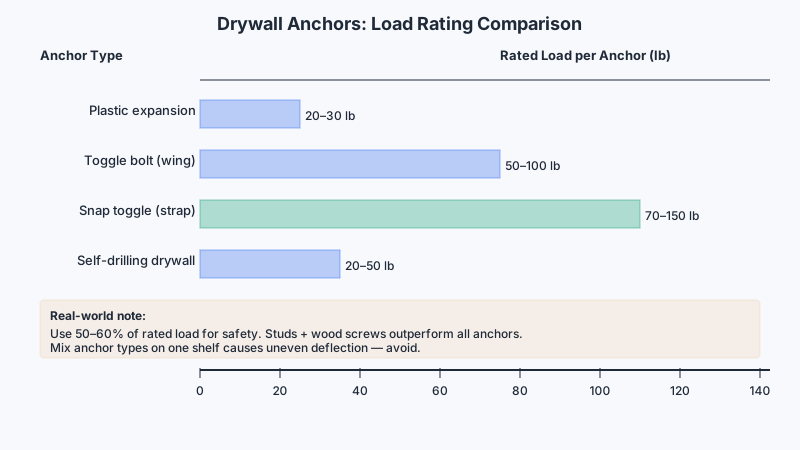
Load ratings on packaging are usually pull-out tests perpendicular to the wall, so treat them conservatively — actual shear loads (downward pull from a shelf bracket) and real-world variability mean you should budget no more than 50–60% of the stated rating for a loaded shelf. Mixing anchor types across a single shelf is a bad idea because they deflect at different rates.
Shelves on Plaster Over Wood Lath
Old plaster is the wall type that trips up the most DIYers. It’s brittle, heavier than drywall, and tends to crack or crumble when drilled at full speed. The lath strips beneath it are only about 1.5 inches wide with narrow gaps between them, so stud-finding is more reliable than relying on the lath itself for holding power.
Drilling technique matters here more than anywhere else. Use a sharp, standard twist bit at slow speed — never a hammer drill setting, which shatters plaster. Tape a small square of painter’s tape over your mark before drilling; it reduces surface cracking and gives the bit a starting grip. Drill through the plaster slowly, then increase speed slightly once you’re clearly in the lath or stud behind it.
For studs behind plaster, the same 2½-inch wood screws work, though you may need slightly longer ones (3 inches) if the plaster coat is thick. For locations between studs, use a toggle bolt rather than a plastic expansion anchor — plaster provides far less compression grip than drywall, so expansion anchors spin out or loosen over time. The toggle’s wings spread across the lath cavity and grip reliably.
Avoid overloading any single plaster location. Old plaster, especially in corners or near windows, may have hairline cracks or separation from the lath that isn’t visible on the surface. For heavy shelving, always try to anchor into studs.
Shelves on Concrete and Masonry Walls
Concrete, brick, and concrete block require a completely different approach: a hammer drill (also called a rotary hammer for larger jobs) and masonry-specific anchors. A standard drill will overheat and wear out its bit quickly, and the hole will be undersized and rough.
Choosing the right masonry bit and anchor:
- Wedge anchors (sleeve anchors): For poured concrete, these expand against the sides of the hole and are extremely strong once set. They’re permanent — removal usually destroys the anchor and leaves a stub in the hole.
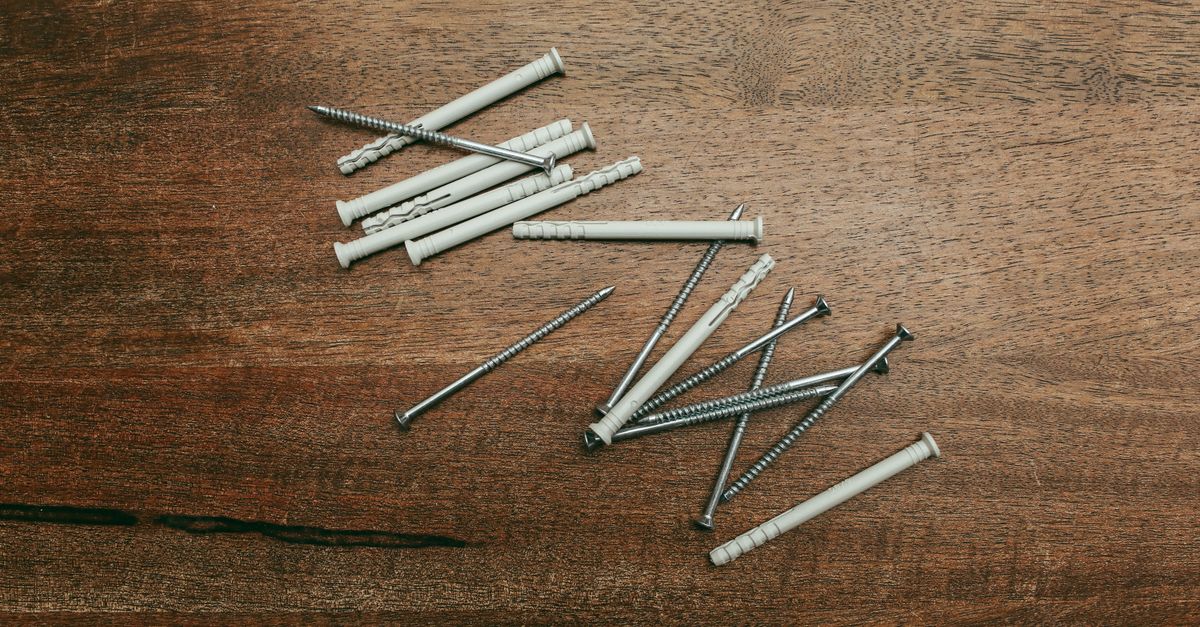
- Screw anchors (Tapcon-style concrete screws): Self-tapping into a pre-drilled masonry hole. Removable and re-usable, and strong enough for most shelf brackets. Drill the pilot hole at the exact diameter specified on the packaging — too large and the screw won’t grip, too small and it may crack the substrate.
- Plastic masonry plugs: The humble red or brown plug that you tap into a drilled hole before driving a wood screw. Fine for light shelves and picture ledges, but their grip degrades noticeably in soft brick or aerated concrete block.
Drill depth should exceed the anchor’s embedment requirement by about 1/4 inch to leave room for dust. Blow the hole clear with a puffer or compressed air before setting any anchor — dust left in the hole significantly reduces holding strength.
For hollow concrete block (CMU), avoid wedge anchors that rely on compression against solid material — they won’t develop full strength in a thin shell. Use a toggle bolt designed for hollow masonry, or a two-part injectable epoxy anchor system, which fills voids completely and bonds to the surface chemically.
Brick walls deserve a note: anchor into the mortar joint rather than the brick face whenever possible. Mortar is softer and easier to repair if you ever remove the shelf; drilling into the brick itself risks cracking a face, particularly on older or softer heritage brick.
Shelves on Tile and Stone Surfaces
Kitchen and bathroom shelves often need to go on tiled walls. Tile can crack if drilled without care, and the surface beneath — usually cement backer board or drywall — still needs the right fastener.
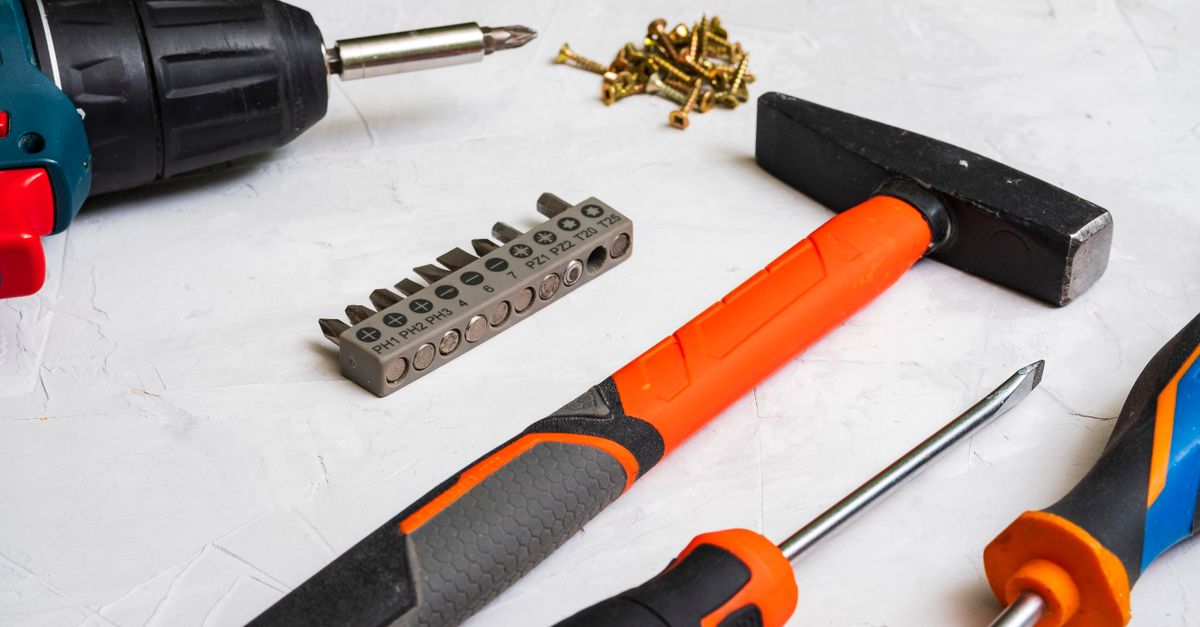
Use a dedicated tile or glass bit (carbide-tipped or diamond-tipped). Mark the spot with tape to prevent the bit from skating across the glaze. Start at very slow speed with almost no pressure — let the bit find its seat in the glaze before increasing speed. Never use a hammer setting while the bit is in the tile; switch on hammer only after you’ve cleared the tile and are in the substrate behind.
If the tile sits on a drywall substrate (common in older bathrooms), treat the hidden wall behind it as drywall: use toggle bolts for non-stud positions and wood screws into studs. If the tile is on cement board, masonry plugs or short Tapcon screws work well.
For very heavy items — glass shelves with significant loads — consider floating shelf brackets that spread the load across multiple tile fasteners rather than concentrating it at two points.
What Can Actually Go Wrong (and How to Spot It Before It Does)
The most common failure modes, and what signals them:
- Anchor spinning in place while you tighten the screw: the hole is too large, or the anchor is the wrong type for the substrate. Back out, fill the hole with a filler rated for that wall type, let it cure fully, and re-drill.
- Plaster spalling around the hole: you drilled too fast or used hammer mode. Patch with setting-type plaster compound, let it harden, and try again with tape and slow speed.
- Shelf tilts downward at one end: almost always means one fastener is in solid backing and one is in a poorly set anchor. Check each bracket independently by pushing straight into the wall — a wobbly bracket needs re-anchoring before loading the shelf.
- Wall feels soft or spongy when you press near the hole: potential moisture damage behind the wall. Stop, investigate for water damage or mold before proceeding.
If your new shelves are destined for a garage or utility space, Garage Workbench Organization That Actually Sticks offers useful ideas for keeping tools and supplies organized once the shelving is up.
Frequently Asked Questions
Can I hang shelves without drilling at all?
Adhesive mounting strips and rail systems that use adhesive pads work for genuinely light loads — manufacturers typically rate them under about 15–20 lb for a pair of strips. Results vary with surface texture and paint condition; glossy, freshly painted, or textured walls significantly reduce adhesion. For anything holding books, heavy décor, or kitchen items, mechanical fasteners are substantially more reliable.
How do I find a stud if my stud finder gives inconsistent readings?
Stud finders struggle on thick plaster, double-layered drywall, and walls with radiant heating cables or wire mesh. In those cases, try the rare-earth magnet method to pick up drywall screws, or drill a small exploratory hole at an angle in an inconspicuous spot and probe with a bent wire to feel for solid wood. Studs are also predictably located near door frames — the structural rough frame almost always has a doubled stud beside it.
Does wall type affect how much weight a shelf can hold?
Yes, substantially. A shelf anchored into studs through drywall can hold significantly more than the same shelf on hollow-wall anchors alone. Solid masonry with proper anchors often outperforms both. The limiting factor shifts depending on the system: sometimes it’s the fastener, sometimes the bracket, sometimes the shelf material itself. Distribute weight toward the anchored ends of a shelf and avoid putting heavy concentrated loads at the center span.
What’s the right drill bit for each wall type?
For drywall and wood: standard twist bits or screwdriver bits (you’re usually just driving screws). For plaster: a sharp twist bit at slow speed. For concrete, brick, and tile: carbide-tipped masonry bits, and for tile specifically a carbide or diamond-tipped tile bit. Never use a regular twist bit on masonry — it dulls almost immediately and produces a rough, undersized hole.
How do I patch a hole if I put it in the wrong spot?
For drywall: lightweight spackle for small holes, a mesh patch kit for anything larger than about half an inch. For plaster: setting-type compound (not pre-mixed spackle, which shrinks) applied in thin coats. For masonry: a hydraulic cement or masonry patching compound tapped firmly into the hole. In all cases, let the patch cure fully before re-drilling nearby — fresh filler has very little strength.