No-Machine Ice Cream: Rich, Scoopable Results Every Time
Making ice cream without a churn sounds like a compromise. It isn’t. The two main no-machine methods — the whipped cream base and the bag-shake method — each produce results that rival a churned batch, as long as you understand what you’re actually doing: preventing large ice crystals from forming while building a stable, fatty emulsion that stays scoopable straight from the freezer.
Why Ice Crystals Are the Real Problem
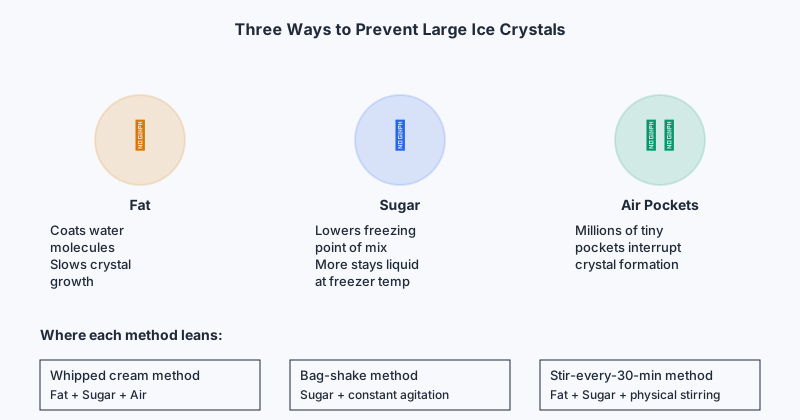
The enemy in homemade ice cream isn’t the lack of a machine — it’s uncontrolled crystallization. When water freezes slowly, it forms large crystals that give ice cream a grainy, icy texture. A standard churn solves this by stirring the mixture continuously as it freezes, breaking up crystals before they grow. Without a machine, you have to use different tools: fat, sugar, and cold.
Fat coats water molecules and slows crystal growth. Sugar lowers the freezing point of the mixture, keeping more of it liquid even at freezer temperatures (your home freezer typically runs around -18°C / 0°F), which means smaller crystals throughout. Whipped cream introduces millions of tiny air pockets that physically interrupt crystal formation. Each method below leans on one or more of these mechanisms.
The Whipped Cream Method (No Stirring Required)
This is the easiest route and produces ice cream with a soft, mousse-like texture that still scoops cleanly after overnight freezing.
What you need:
- 300 ml (1¼ cups) heavy whipping cream, very cold
- 200 ml (¾ cup) sweetened condensed milk
- 1–2 tsp pure vanilla extract
- A pinch of salt
Step 1: Chill everything. Put your mixing bowl and beaters in the freezer for 15 minutes. Cold equipment means the cream whips faster and holds its structure longer.
Step 2: Whip the cream. Whip the cold cream to stiff peaks — it should hold its shape firmly when you lift the beater. Don’t rush this; under-whipped cream collapses during freezing and produces a denser, icier result.
Step 3: Fold in the condensed milk. Pour the condensed milk and vanilla down the side of the bowl and use a large spatula to fold it in gently. The goal is to keep as much air in the whipped cream as possible. A few streaks remaining is fine; overmixing is the real risk.
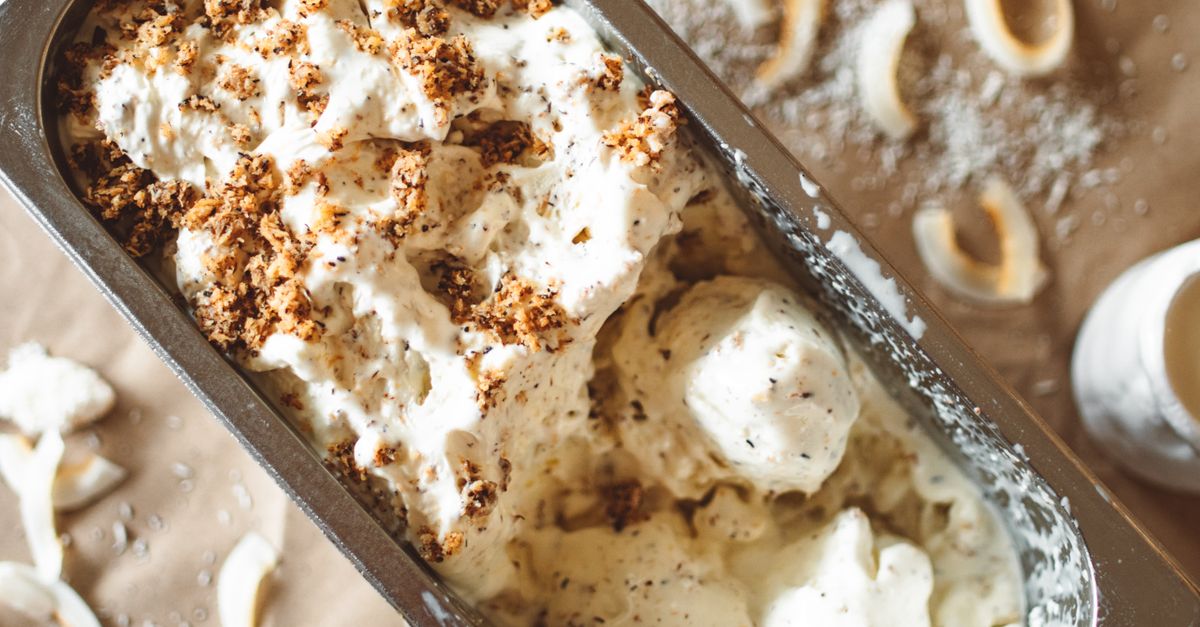
Step 4: Freeze for at least six hours. Pour into a freezer-safe container (a loaf pan works perfectly), press plastic wrap directly onto the surface to prevent ice crystals forming on top, and freeze. Six hours is the minimum; overnight is better.
The condensed milk does double duty here: it provides sweetness and its high sugar concentration actively lowers the mixture’s freezing point, keeping the texture yielding rather than rock-hard.
Flavoring the Whipped Cream Base
The base above is neutral enough to take on almost any flavor.
- Chocolate: Whisk 3 tbsp unsweetened cocoa powder and 2 tbsp powdered sugar into the condensed milk before folding.
- Strawberry: Blend 150 g (about 1 cup) fresh or frozen strawberries with 1 tbsp sugar, strain the seeds out, and swirl into the base just before freezing.
- Coffee: Dissolve 2 tsp instant espresso powder in 1 tbsp warm water, cool it completely, and fold into the condensed milk.
- Salted caramel: Swirl 3–4 tbsp store-bought or homemade caramel sauce through the base just before it goes into the freezer, then scatter flaky sea salt on top.
Avoid folding in watery mix-ins (fresh fruit juice, thin sauces) without reducing or straining them first — extra free water is extra ice.
The Bag-Shake Method (Ice Cream in About 10 Minutes)
This is the physical version: you’re simulating the action of a churn by hand. The result is softer and best eaten immediately, making it ideal for kids or for a single serving you want right now.
What you need:
- 120 ml (½ cup) whole milk or half-and-half
- 1 tbsp granulated sugar
- ¼ tsp vanilla extract
- 2 cups crushed ice
- 4 tbsp rock salt (or table salt in a pinch)
- 1 small zip-lock bag (250–500 ml / quart size)
- 1 large zip-lock bag (gallon size) or a sturdy resealable bag
- Oven mitts or a folded dish towel
Step 1: Combine the milk, sugar, and vanilla in the small bag. Squeeze out as much air as possible and seal it tightly — a double seal is worth it.
Step 2: Fill the large bag with crushed ice and add the rock salt. Salt mixed with ice creates a brine that drops below 0°C / 32°F (pure water ice alone cannot go below its melting point, but a salt-ice mixture can reach around -21°C / -6°F), giving you enough cold to freeze the mix quickly.
Step 3: Place the small bag inside the large one and seal the outer bag.
Step 4: Shake, squeeze, and knead the whole thing for 7–10 minutes, wearing oven mitts or wrapping it in a towel — the outer bag gets very cold very fast. Keep the motion varied: tumble it, squeeze it, shake it. The goal is constant agitation while the mix freezes.
Step 5: When the mixture inside the small bag has the consistency of soft-serve, it’s done. Eat immediately or transfer to a container and freeze for 30–45 minutes for a firmer texture.
Whole milk works but produces a slightly icier result compared to cream. If you want something richer, swap the milk for half-and-half or light cream.
The Stir-Every-30-Minutes Method
Less hands-on than the bag method, less effortless than the whipped cream method, but useful when you don’t have condensed milk and want a custard-style base.
Make a cooked custard (egg yolks, cream, sugar, heated to around 77–82°C / 170–180°F), chill it completely, then pour it into a shallow metal container and put it in the freezer. Every 30 minutes for the first 3–4 hours, take it out and beat it vigorously with a fork or hand mixer — this breaks up the ice crystals as they form. After 3–4 rounds, let it freeze solid.
Metal baking dishes conduct cold faster than plastic, so the mixture freezes more evenly. A shallow, wide container gives you more surface area to break up, which means fewer large crystals.
The trade-off: this method demands you stay near your kitchen for several hours. Miss a stirring window and you get an icy, grainy result. It rewards patience but punishes distraction.
Comparing the Three Methods
| Method | Hands-on time | Wait time | Texture result | Best for |
|---|---|---|---|---|
| Whipped cream + condensed milk | 10–15 min | 6+ hours | Soft, creamy, mousse-like | Most flavors, make-ahead batches |
| Bag-shake | 10 min active | None (eat right away) | Soft-serve to slightly icy | Single servings, kids’ activity |
| Stir-every-30-min (custard) | 10 min + stirring intervals | 4–5 hours total | Closest to churned ice cream | Egg-based, classic flavors |
Getting a Better Scoop: Texture Troubleshooting
Too hard to scoop from the freezer: Let it sit on the counter for 5–8 minutes before scooping. A metal scoop run under warm water also helps. If it’s consistently too hard, your sugar ratio may be too low or your freezer may run unusually cold.
Icy and grainy: The most common cause is using low-fat dairy or adding too much liquid flavoring. Increase the fat content (more cream, less milk), and reduce watery additions. In the whipped cream method, it usually means the cream was under-whipped.
Won’t freeze firm: Too much sugar, or too much alcohol (if you added a liqueur). Reduce by a tablespoon at a time and test again.
Flat flavor: Ice cream is served cold, which mutes flavor perception noticeably. Season your base more assertively than feels right at room temperature — vanilla, salt, and other aromatics should taste almost too strong before freezing.
Frequently Asked Questions
Does no-machine ice cream melt faster than churned ice cream?
Generally, yes. No-machine versions (especially the whipped cream method) tend to have more air and less dense structure, so they soften quickly at room temperature. Serve in cold bowls and work fast, particularly in warm weather.
Can you use plant-based milk for the bag-shake method?
Full-fat canned coconut milk works well and produces a reasonably creamy result because of its high fat content. Thinner plant milks (oat, almond, rice) produce a noticeably icier texture since they have much less fat to slow crystal growth.
Why does salt make the ice colder in the bag method?
Salt lowers the freezing point of water (the freezing-point depression effect). When rock salt dissolves in the surface melt on the ice, the resulting brine needs to reach a much lower temperature to freeze solid again, so it draws heat aggressively from everything around it, including your ice cream mix.
How long does homemade no-machine ice cream keep in the freezer?
Texture degrades over time as ice crystals grow even at freezer temperatures. The whipped cream and custard methods are best within a week or two. Beyond that, the texture becomes progressively icier. Press plastic wrap directly onto the surface and use a well-sealed container to slow this down.
Can you make a no-churn ice cream without condensed milk?
Yes. You can substitute a mixture of heavy cream and powdered sugar, adjusting the ratio until the sweetness and texture match your taste. The condensed milk also contributes body; without it, your mix may need a touch more cream to stay rich. Some recipes use cream cheese (a few tablespoons) as a stabilizer to compensate.