Paint Brush Care: Cleaning and Storage That Actually Lasts

Paint brushes are precision tools, and treating them that way extends their working life from months to years. A sable fan brush or a high-quality flat bristle brush that costs real money deserves more than a quick rinse under the tap. The good news: proper cleaning and storage require no special talent, just the right sequence and a little consistency.
What You Need Before You Start
Gather supplies before the paint dries — particularly with acrylics, where you have a narrow window.
For water-based paints (acrylic, latex, watercolor, gouache):
- Lukewarm water
- Mild dish soap or a dedicated brush cleaner
- A brush-cleaning mat or textured palette
- Clean rags or paper towels
For oil-based paints, enamels, and varnishes:
- Mineral spirits, odorless turpentine, or a citrus-based brush cleaner
- A second rinse solvent (clean mineral spirits or paint thinner)
- A jar with a lid
- Mild dish soap for the final wash
- Rubber gloves
Having two separate jars for solvent cleaning — one for the first dirty rinse, one for a cleaner second pass — reduces solvent waste significantly and leaves the brush in better condition.

Cleaning Water-Based Paint from Brushes
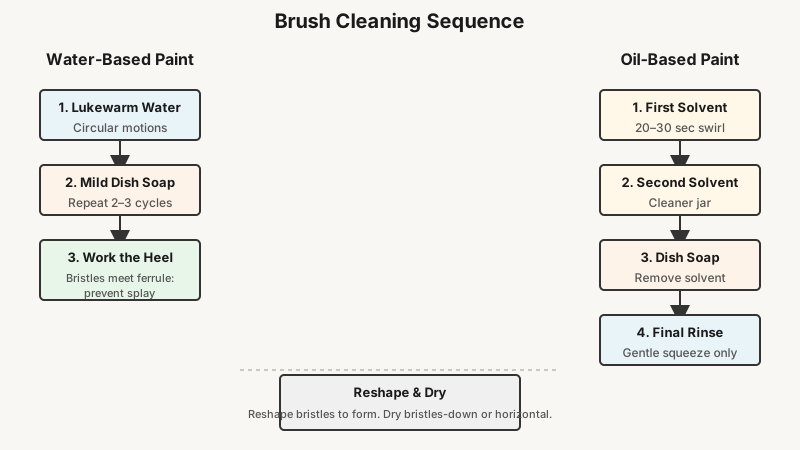
Rinse the brush under lukewarm — never scalding — water as soon as you finish painting. Hot water can loosen the glue holding bristles to the ferrule, and cold water is less effective at moving fresh latex or acrylic. Work the bristles against your palm or a rubber cleaning mat in circular motions until the water runs clear.
Then work a small amount of mild dish soap into the bristles, again using your palm or the mat. Rinse. Repeat this soap cycle two or three times until absolutely no pigment lifts out. With cheaper student-grade acrylics this might take only one pass; with heavy-body paints in saturated colors like cadmium red or phthalo blue, expect more cycles.
The heel matters most. Pigment accumulates where the bristles meet the ferrule — the metal band at the base. If you don’t work the soap all the way up to the heel, dried paint builds up there over several sessions, gradually splaying the bristles outward until the brush loses its point or chisel edge permanently. A few extra seconds at the heel with each cleaning prevents this.
For dried-on acrylic, soak the brush in isopropyl alcohol for a few minutes, then work the softened paint out with a comb or stiff nylon brush. Acetone works faster but can dissolve synthetic bristles and some brush handles, so use it as a last resort on bristles you know are natural hair.
Cleaning Oil-Based Paint from Brushes
Never let an oil-paint brush dry out between sessions without protecting it first. If you’re returning to it within 24–48 hours, wrap the bristles tightly in plastic film to exclude air. For proper cleaning:
- First solvent dip: Pour a small amount of mineral spirits into a jar. Swirl the brush against the bottom and sides for 20–30 seconds, then press the bristles against the jar wall to squeeze out pigmented solvent. Do not wipe the brush dry yet.
- Second solvent dip: Move to your cleaner jar of mineral spirits. Repeat the swirling motion. By this stage, very little pigment should be releasing.
- Soap wash: Rinse the brush under warm water, then work dish soap through the bristles down to the heel. This removes the solvent residue, which you don’t want sitting in the bristles long-term.
- Final rinse: Rinse until no soap remains, then squeeze out excess water gently — never wring or twist.
Odorless mineral spirits are a good default choice because they’re less aggressive on both bristles and the surrounding air. Citrus-based brush cleaners take longer to work but are lower in volatile organic compounds (VOCs), which matters if your studio has limited ventilation.
Solvent disposal: Don’t pour used mineral spirits down the drain. Let the pigment settle to the bottom of a sealed jar over a day or two, then decant the clarified solvent back into your working jar for reuse. The sludge at the bottom counts as hazardous waste in most jurisdictions and should go to a household hazardous-waste facility.

Reshaping and Drying Brushes Properly
This step is where most people cut corners, and it’s where most long-term brush damage happens.
After the final rinse, shake out excess water with a single downward flick of the wrist. Then use your fingers to reshape the bristles back to their intended form — a point for rounds, a flat chisel for flats, a gentle spread for fans. If the bristles won’t hold shape, a tiny amount of brush soap or even hair conditioner worked into the tip (then rinsed out before the next use) can help them hold their geometry while drying.
Dry bristles-down or horizontal — never bristles-up in a jar. When water sits in the ferrule and drains into the handle, it loosens the adhesive and can crack wooden handles that have absorbed moisture repeatedly. Lay brushes flat on a clean towel or hang them bristle-down from a brush holder. Let them dry completely — at least a few hours for thin brushes, overnight for large mop or hake brushes — before storing.
How to Store Paint Brushes Long-Term
Short-term storage (a few days between sessions) is straightforward: lay brushes flat, bristles free and unsquashed.
For longer storage, a few options each have real advantages:
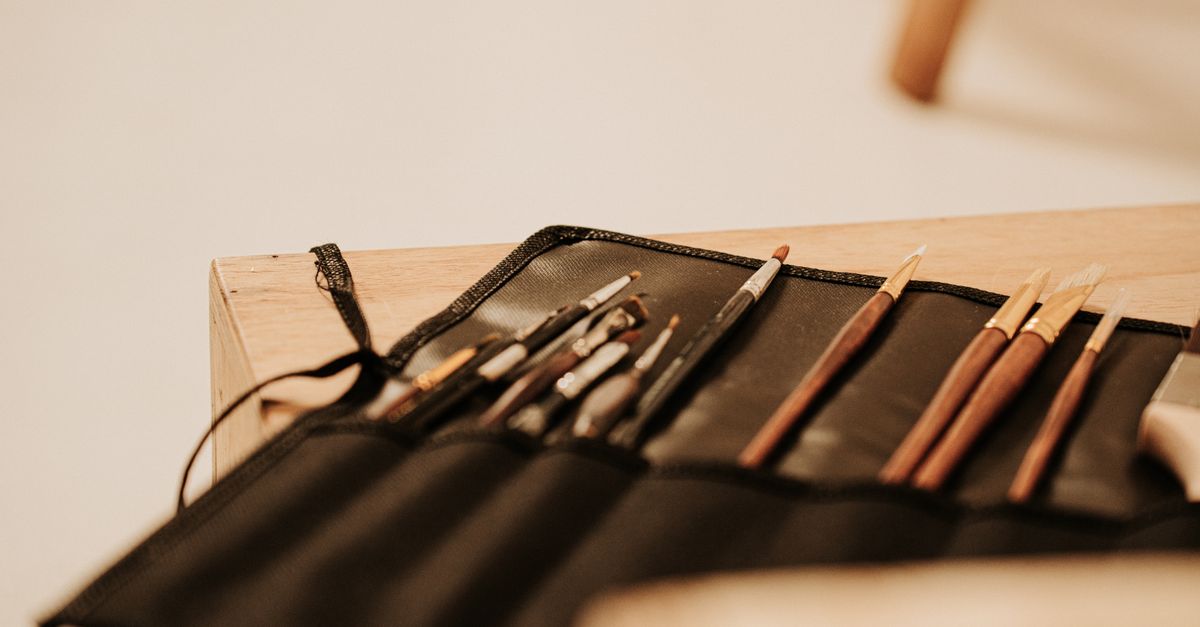
Brush rolls or wraps hold each brush individually in a separate sleeve, preventing the bristles of one brush from bending against another. Canvas or leather brush rolls are especially useful for travel or studio moves. Make sure the brushes are fully dry before rolling — trapping moisture in canvas can encourage mildew.
Rigid brush cases or tubes protect delicate brushes from being crushed. The downside is airflow: if a brush goes in slightly damp, a closed case traps humidity. Only use these with bone-dry brushes.
Cedar blocks or mothballs in a storage container can deter silverfish and carpet beetles, which occasionally damage natural-hair brushes (sable, squirrel, hog hair). Silverfish and fabric pests are real threats if brushes are stored in a humid or infrequently visited space.
Temperature and humidity: Dramatic temperature swings cause wooden handles to expand and contract, which fatigues the ferrule crimp over time. A stable, moderately dry room is ideal. Avoid storing brushes in a garden shed or car trunk where temperatures swing widely.
If your painting supplies are scattered across the house alongside other clutter, How to Declutter Your Home Step by Step (That Actually Works) can help you set up a system where tools like these actually stay findable.
Special Cases: Brushes You Might Be Handling Wrong
The same principles that keep fabrics fresh in storage apply here too, and Winter Coat Storage That Stays Fresh and Odor-Free offers useful tips on avoiding musty smells and pests in long-term storage.
Watercolor Brushes
Natural-hair watercolor brushes — kolinsky sable especially — are unusually sensitive. Never use hot water or harsh soap. A gentle swirl in room-temperature water and a light press against your palm is usually enough; the pigment loads are lighter than with acrylics or oils. Re-point the tip after every cleaning while the bristles are still damp. Store them upright in a jar (bristles up) only once they’re fully dry, or in a brush case with each brush sheathed.
House Painting Brushes
For latex wall paint, the same warm-water-and-soap principle applies, but the scale is bigger. A brush spinner (a tool that fits into a drill and spins the brush to fling water out centrifugally) cleans house-painting brushes in a fraction of the time. Work the soap into the heel thoroughly — a large 4-inch wall brush accumulates a surprising volume of paint up near the ferrule after a full day’s painting. Store these hanging bristle-down or wrapped in the original cardboard sleeve, which holds the bristles in shape.
Foam Brushes and Rollers
Foam brushes are technically semi-disposable, but they survive several uses if cleaned immediately. Squeeze the foam under running water until it runs clear. Do not twist — foam tears easily. Store flat. Roller covers for latex paint clean well under a strong stream of water with the help of a roller cleaner tool; oil-based roller covers are rarely worth the solvent cost and are usually discarded.
Frequently Asked Questions
Can I save a brush with completely dried acrylic paint in it?
Often yes, though the degree of difficulty depends on how long the paint has been dry. Soaking the bristles in isopropyl alcohol (70–90%) for 15–30 minutes softens dried acrylic. Work the paint out gently with a comb or your fingers; if needed, repeat the soak. The bristles may come out slightly stiffer than before, but a usable brush is usually recoverable. Avoid acetone on synthetic bristles.
How often should I replace paint brushes?
There’s no fixed schedule. A well-maintained quality brush can last years; a neglected cheap brush might be useless after a few sessions. Replace a brush when it splays permanently, loses its point or edge, or sheds bristles into wet paint despite good care — not on a timed schedule.
Is it safe to clean oil-paint brushes with water alone?
No. Oil paint is not water-soluble; water will move the surface layer around but leave oily residue deep in the bristles. You need a solvent first (mineral spirits, turpentine, or citrus cleaner), then a soap-and-water wash to remove the solvent residue. Skipping the solvent step leads to gradual bristle stiffening.
Why do my brush bristles keep splaying outward?
The most common cause is paint drying in the heel — where the bristles meet the ferrule — which pushes the bristles apart over time. The fix is cleaning all the way up to the ferrule at every session, not just rinsing the tips. Pressing the bristles firmly against the palm while soaping, rather than just running water over the brush, reaches the heel more effectively.
Can I store brushes bristle-up in a jar between sessions?
Only if they’re fully dry. Storing wet brushes bristle-up allows water to wick down into the ferrule and handle, loosening the glue and eventually causing handle swelling or bristle loss. Once dry, upright bristle-up storage in a jar is fine and common, especially for watercolor brushes.
Keeping the Habit Simple
The biggest threat to paint brushes isn’t poor technique — it’s letting cleaning slip when you’re tired or short on time. A useful shortcut: keep a small container of water or solvent (appropriate to your medium) within arm’s reach while painting, and swirl brushes in it during natural breaks rather than letting them sit loaded. This doesn’t replace a proper clean, but it dramatically reduces the amount of dried paint you have to deal with at the end of a session.
Treat brush care as part of the painting process rather than a post-session chore, and the routine becomes automatic quickly.