Removing Salt Stains from Shoes: The Right Fix
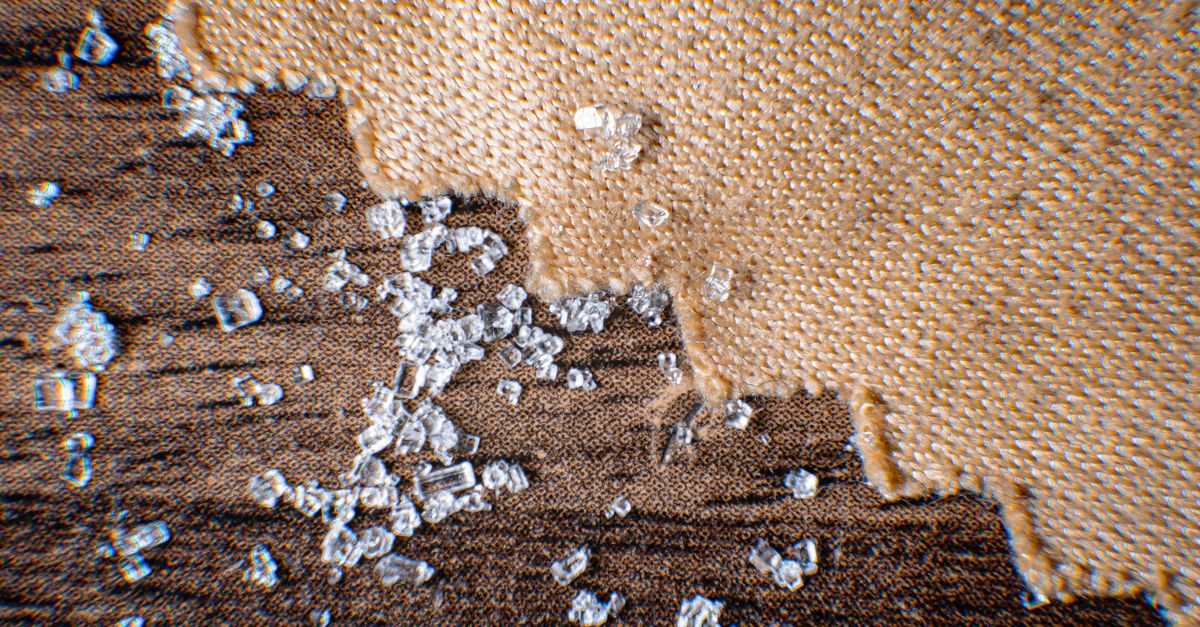
Salt stains on shoes are one of those problems that look simple but punish the wrong approach. Wipe with a dry cloth and you grind salt crystals deeper into the leather or fabric fibers. Use plain water on suede and you risk a tide mark worse than the original stain. The good news: with the right technique for each material, salt stains come out cleanly and the shoe is no worse for it.
This guide covers leather, suede and nubuck, canvas, and synthetic uppers — the four surfaces where salt damage shows up most differently — plus what to do when the stain has been sitting for weeks.
Why Salt Stains Are Different from Ordinary Dirt
Winter road salt, ocean spray, and sweat-salt all leave the same calling card: a white, chalky residue that forms when salty water soaks into a material and then evaporates, leaving mineral deposits behind. The damage has two layers:
- Surface residue — the visible white crust that sits on top of or just inside the surface fibers.
- Waterline damage — where the salt-laden water stopped evaporating, it draws a distinct tide mark. On leather this can harden and crack the finish if left untreated.
Salt is also hygroscopic — it draws moisture toward itself. On leather that translates to dryness and eventual cracking; on suede it matts the nap. Speed matters: a stain treated within a day or two is far easier to reverse than one that has set for a month.
Leather Shoes: Neutralize Before You Condition
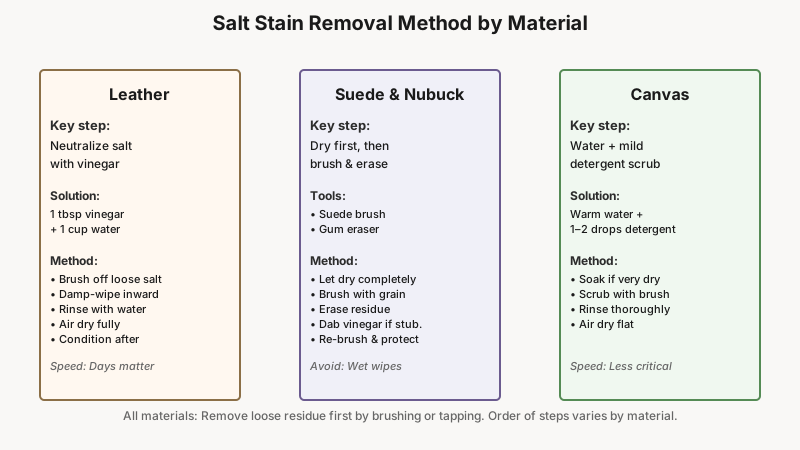
Leather responds well to salt-stain removal, but the order of steps is critical. Skipping the neutralization step and going straight to conditioning traps salt in the leather, which continues to draw moisture and eventually causes cracking.
What you need:
- White distilled vinegar (about 1 tablespoon)
- Clean water (about 1 cup)
- Two soft cloths (microfiber or old T-shirt material)
- A leather conditioner — something like a lanolin-based cream or neatsfoot oil works well
Steps:
- Brush off loose residue — tap the soles together and use a soft brush or dry cloth to remove any crumbly salt crust. Do this over a bin; you don’t want to rub the crystals back in.
- Mix the solution — combine one tablespoon of white vinegar with one cup of cool water. The mild acidity of vinegar neutralizes the alkaline salt without damaging the leather finish.
- Damp-wipe, don’t soak — dip one cloth in the solution, wring it until it’s barely damp, then wipe the stained area using circular, overlapping strokes. Work from the outside edge of the stain inward to avoid spreading it.
- Wipe with plain water — use the second cloth, dampened with plain water, to remove any vinegar residue.
- Air dry fully — stuff the shoe loosely with paper (not newspaper — the ink transfers) and let it dry at room temperature, away from direct heat. Radiators accelerate drying but can crack leather.
- Condition — once dry, apply a thin layer of leather conditioner. This replaces oils that salt strips out and restores the surface’s flexibility.
For patent leather, use a barely damp cloth only — no vinegar, as it can dull high-gloss finishes. Buff dry immediately.
Once the salt residue is neutralized, restoring shine and suppleness is its own skill, and our guide Polishing Leather Shoes: Technique Over Products covers the technique-driven approach that keeps leather looking sharp.
Suede and Nubuck: More Caution, Different Tools
Suede and nubuck are the surfaces where most people go wrong, because the instinct is to wipe with a damp cloth — which often sets a new waterline. These materials respond better to a mostly-dry approach.
What you need:
- A suede brush (brass or nylon bristles)
- A suede eraser or art gum eraser
- White distilled vinegar (optional, for stubborn marks)
- A suede protector spray for afterward
Steps:
- Let the shoe dry completely — if it’s still damp from the snow or rain, resist the urge to treat it immediately. Stuffed with paper, let it dry naturally first. Treating damp suede creates new marks.
- Brush with the grain — once dry, use the suede brush in short, even strokes following the nap direction to lift the salt crystals. Many stains at this stage are largely gone.
- Use the eraser on residue — rub gently with a suede eraser in one direction for remaining white marks. The eraser crumbles the mineral deposit without wetting the surface.
- For stubborn tide marks — dampen a cloth very lightly with undiluted white vinegar and dab (don’t wipe) the mark. Let it dry completely, then brush the nap again. This sounds counterintuitive but vinegar dries without leaving a new waterline because it evaporates cleanly.
- Re-raise the nap — finish with the suede brush, this time using a back-and-forth motion to restore the texture.
- Apply protector — a silicone- or fluoropolymer-based suede protector spray adds a barrier against the next rain or salt encounter. Reapply every few weeks during winter.
Nubuck follows the same process; it just has a tighter, shorter nap so the eraser does most of the work.
Canvas and Fabric Shoes: Soak and Spot-Treat
Canvas (think classic sneakers), mesh, and woven uppers are more forgiving. They can handle actual wetting without the tide-mark risk that suede carries, which simplifies the process.
Steps:
- Remove laces and insoles — these should be washed separately in warm, soapy water.
- Rinse the stained area — hold the shoe under cool, running water to flush surface salt out of the fibers.
- Spot-treat with dish soap — a drop of mild dish soap on a soft brush (an old toothbrush works perfectly) scrubbed into the stain lifts embedded salt deposits. Work in circles, then rinse.
- For set stains — make a paste of 1 part white vinegar to 1 part baking soda, apply it to the stain, let it sit for 10–15 minutes, then scrub and rinse. The reaction helps break apart mineral residue. Note: baking soda is slightly abrasive, so test on an inconspicuous spot first.
- Air dry — stuff loosely with paper and dry at room temperature. A dryer can warp the glue holding soles and uppers together on most casual shoes.
For white canvas, a small amount of non-chlorine oxygen bleach (like OxiClean dissolved in water) can clear the last traces of a stain without yellowing the fabric — something chlorine bleach is notorious for.
Synthetic Uppers: The Easiest Case
Fully synthetic materials — smooth PU leather, coated nylon, rubberized uppers — are non-porous, so salt sits on the surface rather than penetrating it. A solution of equal parts water and white vinegar on a cloth, wiped across the surface, removes most salt stains in under a minute. Dry with a second cloth. No conditioning step needed; unlike genuine leather, synthetics don’t absorb oils.
If your synthetic uppers are white and showing more than just salt haze, How to Clean White Sneakers at Home: Baking Soda Paste Fix offers a simple baking soda paste fix that tackles overall grime too.
Old, Set-In Salt Stains
A stain that has been on a shoe for weeks or months has had time for the salt to crystallize more deeply and for the minerals to interact with dyes in the material. Results become less predictable, and you should set realistic expectations:
- Leather: repeat the vinegar-solution treatment two or three times, allowing full drying between rounds, then condition generously. A shoe cream matched to the leather’s color can disguise any faint residual mark.
- Suede: a professional suede restoration treatment (available from shoe-care brands) uses solvents that penetrate deeper than vinegar. If the nap is permanently flattened, steaming lightly — from a distance, not pressing — while brushing can sometimes re-raise it.
- Canvas: a longer soak in warm water with dish soap before scrubbing helps rehydrate the dried mineral deposit before you work it out.
In extreme cases — white tide marks on expensive suede boots, for example — a cobbler with suede restoration experience is worth the cost. A skilled restorer can re-dye and re-finish areas where DIY methods have stalled.
Preventing Salt Stains Before They Start
Prevention is faster than cleaning. A few consistent habits make a real difference:
- Spray before you wear — a water and stain repellent applied to clean, dry shoes creates a barrier. For leather, a wax-based polish provides some resistance; for suede and canvas, a dedicated spray repellent is more effective.
- Wipe down when you get in — a barely damp cloth across shoes immediately after coming in from salted streets removes surface salt before it dries and penetrates.
- Rotate footwear — wearing the same shoes every day in winter gives salt no time to be removed between uses. A spare pair allows proper drying and treatment.
- Choose salt-resistant materials in winter — rubber boots and fully coated waterproof uppers don’t absorb salt at all, making them practical for heavy-salting days.
Frequently Asked Questions
Does regular shoe polish remove salt stains from leather?
No — polish is designed to add color and shine to a clean surface, not to lift mineral deposits. Applying polish over a salt stain seals the salt in. Always remove the stain and let the shoe dry fully before polishing.
Can I put salt-stained shoes in the washing machine?
For canvas sneakers, a machine wash on a gentle cold cycle (shoes in a mesh bag, no heat dry) is generally fine, but check the manufacturer’s care label first. For leather, suede, or structured dress shoes, machine washing will distort the shape and damage the materials — always hand-treat those.
Why does vinegar work on salt stains?
Vinegar (acetic acid) is mildly acidic, which neutralizes the alkaline mineral salts left by road-treatment compounds or evaporated sea water. It breaks the mineral bond so the residue can be wiped or brushed away, and it evaporates cleanly without leaving a new residue of its own.
Will the vinegar smell linger on my shoes?
The smell of white distilled vinegar dissipates as it dries, typically within 20–30 minutes at room temperature. If you’re sensitive to it, adding a small amount of water reduces the concentration without significantly affecting results.
My suede changed color after I removed the stain — is it permanent?
Not always. Salt can temporarily flatten the nap or shift its reflective angle, making the color look different. After the shoe is completely dry, brush the nap back up with a suede brush — the color often returns. If it doesn’t, a suede renovator spray in a matching color (available from most shoe-care brands) can restore an even tone.