Vacuum Cleaner Suction: Keep It Powerful Long-Term
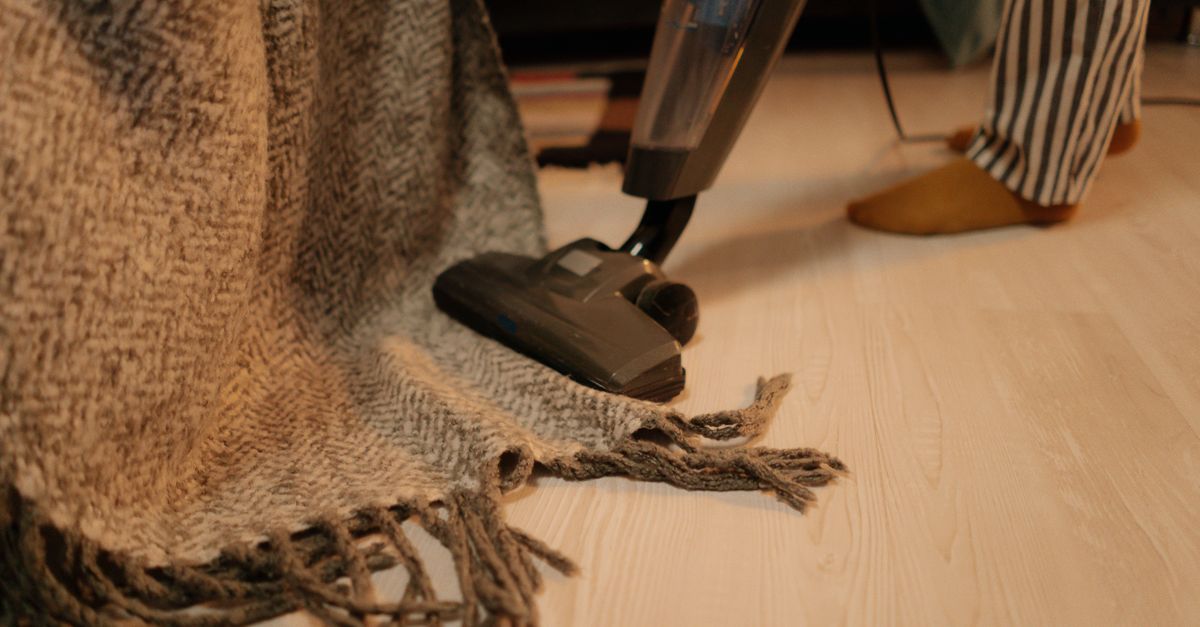
Weak suction is the most common complaint about vacuum cleaners, and it almost always comes down to the same handful of fixable problems. Before you assume your machine is worn out, it’s worth knowing that most suction loss is caused by maintenance failures — clogged filters, packed brush rolls, and overstuffed bags — rather than mechanical failure. Work through the basics systematically and you’ll often restore full performance in under 20 minutes.
Why Suction Drops in the First Place
A vacuum works by creating a pressure differential: the motor spins a fan that pulls low-pressure air through the machine. Anything that restricts airflow reduces that differential, and suction falls. The restrictions accumulate gradually, which is why suction often drops so slowly you don’t notice until it’s quite bad.
The main culprits, roughly in order of frequency:
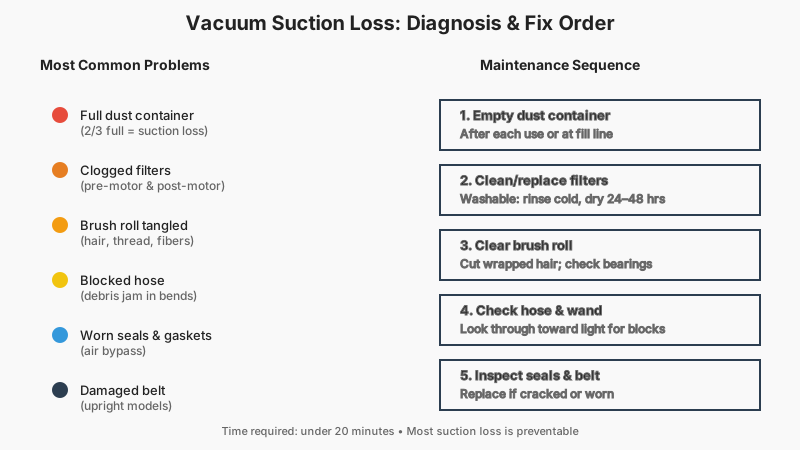
- Full or nearly full dust container — most bagged models start losing suction at around two-thirds capacity, well before the bag looks stuffed
- Clogged or overloaded filters — foam, pleated HEPA, and fabric filters all trap fine particles that eventually block airflow
- Blocked brush roll or beater bar — hair, thread, and carpet fiber wrap tightly around the agitator and can stop it spinning altogether
- Blocked hose or wand — a single sock or clump of debris jammed in a bend can cut suction to almost nothing
- Worn or cracked seals and gaskets — air leaking into the system bypasses the motor, starving the nozzle of suction
- A damaged or worn belt — on upright models, a slipping or broken belt leaves the brush roll spinning weakly or not at all
Knowing the mechanism makes the maintenance routine make sense, rather than feeling like a checklist of chores.
The Core Maintenance Routine
Empty the Dust Container Early and Often
For bagged vacuums, change the bag when it’s around half to two-thirds full — waiting for the indicator light (if there is one) often means you’ve already lost meaningful suction. Overfilling compresses dust against the bag material and makes it act like a filter rather than a container.
For bagless models, empty the canister after every session, or whenever it reaches the marked fill line. Tap the canister gently over a bin (outdoors if you have allergies) to dislodge packed debris. On cyclonic designs, fine dust can cake onto the inner walls and cone surfaces; wipe these down with a dry cloth every few empties, or rinse with water and let the canister dry completely — usually 24 hours — before reinstalling.
Clean or Replace Filters Consistently
Filters are the single biggest variable in suction maintenance. Most modern vacuums have at least two: a pre-motor filter that protects the motor, and a post-motor or exhaust filter (often a HEPA) that cleans the air before it exits the machine.
Washable filters: Rinse under cold water (never hot — it can damage the pleating) until the water runs clear. Don’t use detergent unless the manufacturer explicitly recommends it. The critical step is drying: a damp filter reinstalled in the vacuum will mold and restrict airflow almost immediately. Leave it to air-dry for a full 24 hours at minimum — 48 hours in humid conditions. Never use a hair dryer or oven; high heat warps pleated HEPA media.
Non-washable filters: Tap gently over a bin to dislodge surface dust. Don’t wash them. Replace on the manufacturer’s schedule — typically every 6–12 months for regular household use, sooner if you have pets or a dusty home.
If your machine has a foam sleeve around the main filter, wash that separately each time you clean the pleated filter and replace it once it starts to crumble or discolor permanently.
Clear the Brush Roll
Hair and thread wrap around the agitator and progressively reduce its ability to agitate carpet fibers — which means it picks up less, regardless of suction power. On many machines the brush roll is also a significant airflow pathway, so a packed roll blocks suction directly.
Most brush rolls pop out with a coin-turn or a single screw. Once removed:
- Cut through wrapped hair with scissors along the length of the roll — cut at a shallow angle to avoid nicking the bristles.
- Pull the loosened clumps free.
- Check the bearings at each end: they should spin smoothly. A gritty or stiff bearing is a sign to replace the brush roll rather than just clean it.
- Wipe the roll channel clean before reinstalling.
For households with long hair or pets, doing this monthly prevents the gradual drag that burns through belts and stresses the motor.
Inspect and Clear the Hose and Wand
A blockage anywhere in the air path has the same effect as a clogged filter — it cuts suction at the nozzle. To check:
- Detach the hose from both ends and look through it toward a light source. If you can’t see clearly, there’s a blockage.
- A broom handle or long flexible brush pushed gently through the hose will usually dislodge most obstructions. Never use something rigid and sharp that could puncture the hose.
- Run your hand along the outside of the hose while the vacuum is running (with hose reattached at the motor end, open at the other). You can often feel the pulse of airflow weaken at the site of a partial blockage or a crack.
Cracks and holes in hoses are common failure points. A split hose leaks suction badly and the fix is usually a replacement hose (not tape — tape works briefly but peels and creates new blockages).
Check Seals, Gaskets, and Connections
Every connection point — where the hose meets the body, where the canister or bag compartment seals, where filter covers latch — is a potential air leak. These leaks let outside air into the system, which the motor pulls through the path of least resistance rather than through the nozzle.
Test by holding your hand near each connection while the vacuum runs. Any draft you can feel is a leak. Rubber gaskets harden and crack over time; replacement gaskets for most popular brands are widely available as genuine parts or aftermarket alternatives and typically cost very little.
Make sure every latch and cover is fully closed after you reassemble the machine after cleaning. It sounds obvious, but an ajar filter cover is a common source of unexplained suction loss after maintenance.
Replace Belts When Needed
On upright and some canister models with powered heads, a rubber drive belt connects the motor to the brush roll. Belts stretch with age, reducing their ability to spin the brush roll at full speed. Most manufacturers recommend replacing the belt annually or every 50–100 hours of use — a range that varies a lot depending on belt type and how hard the machine works. Flat rubber belts tend to stretch faster than cogged or toothed belts.
Signs a belt needs replacing: brush roll is sluggish, you smell a burning rubber odor during use, or the belt looks shiny, cracked, or slack. Most belts are inexpensive and straightforward to swap.
Suction Maintenance by Vacuum Type
The routine above covers most machines, but the specifics differ meaningfully by design:
Upright vacuums tend to have shorter air paths but are more prone to brush roll belt wear. Prioritize belt and brush roll maintenance alongside filter care.
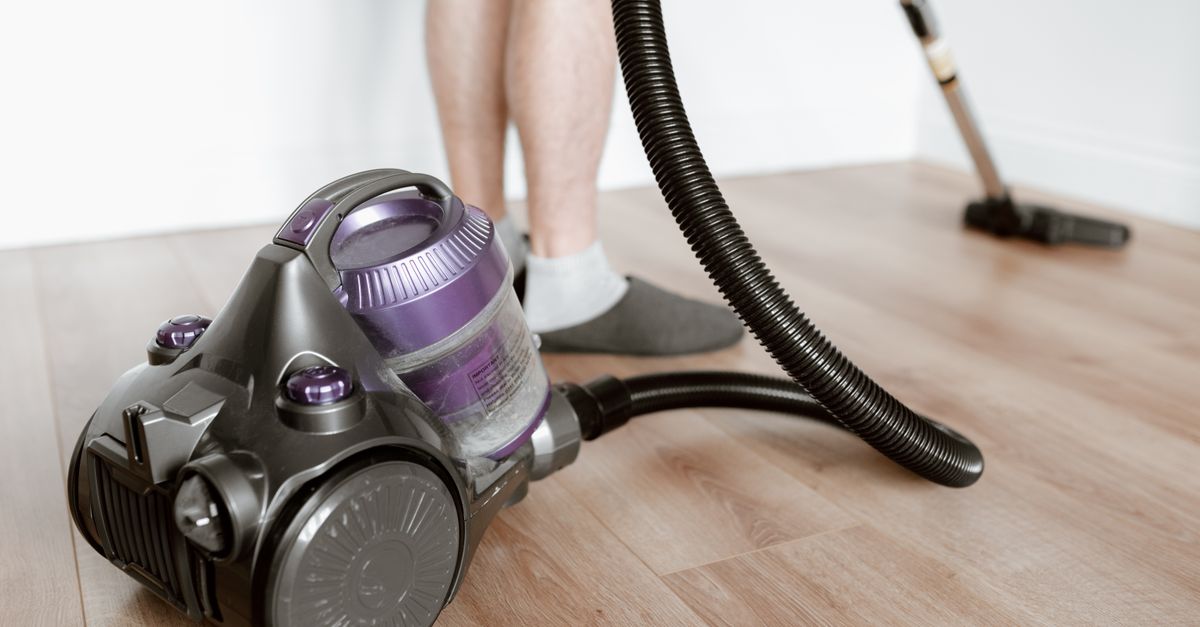
Canister vacuums have longer hose runs, meaning more places for blockages and leaks to develop. Inspect the hose and wand connections carefully. The powered head (if fitted) has its own brush roll and sometimes its own belt.
Stick and cordless vacuums have very small filters that clog quickly, especially on models with smaller motors. Empty the canister and clean the filter after every few uses rather than weekly. Battery performance also affects suction on cordless models — a battery that won’t hold a full charge delivers less motor power.
Robot vacuums have multiple small filters and a side brush that wraps hair just as badly as a full-size brush roll. The rubber squeegee and rubber blade in the main brush module need cleaning every session, and the cliff sensors and charging contacts need wiping weekly to keep the machine functioning properly.
Wet/dry vacs need the filter removed before vacuuming liquids (on most models — check your manual), and the drum needs cleaning and drying after wet use to prevent mold.
If you’re trying to reduce waste and cut down on disposable cleaning products in general, Sustainable Living in Small Apartments: 15 Real Tips offers plenty of practical ideas beyond just vacuuming.
How Often Is Often Enough?
A rough schedule for typical household use (adjusted more frequently for pets, allergies, or heavy use):
- After every session: Empty canister or check bag fullness
- Monthly: Clear brush roll of hair and debris; check hose for blockages
- Every 1–3 months: Clean washable filters (let dry fully before reinstalling)
- Every 6–12 months: Replace non-washable filters; replace drive belt; inspect seals and gaskets
- As needed: Replace bag; replace cracked or split hose; replace worn brush roll
If you notice a sudden drop in suction rather than a gradual one, work through a quick blockage check first — a single obstruction in the hose or at the inlet is often behind it.
Sticking to a maintenance schedule like this is easier when you’ve built the right habits, and How to Stay Motivated on Long-Term Hobby Projects has useful strategies for staying consistent over time.
Frequently Asked Questions
Why does my vacuum smell bad when I run it?
The most common causes are a dirty filter, a full bag with moldy contents, or a tangled brush roll generating friction heat. Clean the filter and brush roll, change the bag, and run the machine briefly with the filter clean and dry. Pet dander accumulates in filters and bags and is a particularly strong odor source. If the smell is burning rubber, check the belt.
Can I use my vacuum if the filter is wet?
No. A wet filter blocks airflow and can grow mold inside the machine within a day or two. It also risks sending moisture toward the motor. Always wait for a full dry cycle — 24 to 48 hours — before reinstalling a washed filter.
How do I know if I have a blockage or a dying motor?
Remove the hose completely and hold your hand over the machine’s suction port with the vacuum running. If suction there is strong, the motor is fine and the problem is downstream — a blockage in the hose, wand, or attachment, or a clogged filter. If suction at the port is weak, the problem is upstream — a full bag, a clogged pre-motor filter, or a motor issue.
Does the type of flooring affect how I maintain my vacuum?
Yes, indirectly. Carpet users accumulate far more fiber and hair on the brush roll than hard-floor users, so brush roll cleaning needs to happen more often. Hard-floor users with no carpet may be able to skip brush roll maintenance almost entirely if they keep the agitator off, but should pay close attention to fine-dust filter clogging, since smooth floors kick up more airborne particulate than carpet does.
Is it worth servicing an older vacuum or just replacing it?
If the motor is running but suction is poor, parts replacement (belt, filter, hose, brush roll) usually costs a small fraction of a new machine and restores full performance. If the motor is genuinely failing — noisy, sparking, intermittently cutting out — repair costs typically approach or exceed the machine’s replacement value. A vacuum that works well after basic maintenance will continue to work well for years; one with a failing motor is generally not worth a costly repair.